

Rooftop Site Builds: The Key to Expanding Wireless Connectivity in Urban Areas In today’s fast-paced world, the demand for seamless wireless connectivity continues to rise, especially in dense urban environments. Rooftop site builds have become an essential part of infrastructure development, enabling mobile networks, Wi-Fi providers, and other wireless technologies to meet the needs of an ever-connected society. In this blog, we will explore the significance of rooftop site builds, their benefits, and the process involved in constructing these essential communication hubs. 1. What is a Rooftop Site Build? A rooftop site build refers to the installation of communication equipment such as antennas, satellite dishes, or cellular towers on the rooftops of buildings, providing coverage for wireless communication systems. These sites are used by telecommunications companies, internet service providers, and other technology businesses to transmit signals to nearby areas, improving network coverage and connectivity. Rooftop sites are particularly beneficial in densely populated urban areas where traditional ground-based towers would be difficult to construct due to space limitations. By utilizing rooftops, providers can expand their network coverage while minimizing the use of valuable land resources. 2. Why Rooftop Site Builds Are Essential With urban areas experiencing rapid growth and increasing demands for reliable communication, rooftop site builds offer a range of advantages: Maximizing Space: Urban areas are often space-constrained, with little available land for constructing traditional cell towers. Rooftop sites make use of underutilized spaces, such as flat roofs, to install communication equipment without taking up valuable real estate. Enhanced Coverage: By placing antennas and communication equipment on rooftops, signal coverage is extended over a wider area. Rooftop sites allow for more direct line-of-sight communication, reducing interference from obstacles like buildings or trees, leading to improved signal strength and coverage. Cost-Effective: Constructing a rooftop site is often more cost-effective than building a ground-based tower, especially in urban areas where land prices are high. Rooftop installations typically require less infrastructure and can be completed faster. Quick Deployment: In areas where rapid network expansion is required, rooftop sites can be deployed much more quickly than ground-based towers. These installations can often be completed in a matter of weeks, ensuring minimal downtime and faster access to wireless networks. 3. The Process of Building a Rooftop Site Building a rooftop site involves several stages, each of which requires careful planning, coordination, and attention to detail. Here’s an overview of the key steps involved in the process: 3.1 Site Assessment and Planning The first step in any rooftop site build is conducting a thorough site assessment. This includes evaluating the structural integrity of the roof, checking for accessibility, and ensuring the roof can handle the weight and size of the equipment. Additionally, factors such as local zoning laws, permits, and environmental impact must be considered. A detailed site plan is created, outlining the type of equipment required, its placement on the roof, and how it will be connected to the power grid and data networks. 3.2 Designing the Infrastructure Once the site is assessed, the next step is to design the infrastructure. This includes deciding on the type of antennas, communication equipment, and power sources that will be used. The equipment must be chosen based on factors like the area’s wireless needs, the types of signals being transmitted, and potential interference. Rooftop structures must be carefully designed to ensure they are secure and can withstand weather conditions such as high winds, rain, and snow. This often involves installing mounting systems and reinforcing the roof to support the added weight of the equipment. 3.3 Installation With the design in place, installation begins. The equipment is delivered to the site, and the antennas, satellite dishes, or communication towers are carefully mounted on the roof. This process requires skilled technicians to ensure that the equipment is installed correctly and safely. The installation team will also handle wiring and cabling, ensuring that the communication equipment is connected to power sources and data networks. A backup power supply may be included to ensure continued operation during power outages. 3.4 Testing and Optimization After installation, the system undergoes extensive testing to ensure that everything is functioning as expected. This includes checking signal strength, connectivity, and overall performance. Any issues with signal interference or equipment malfunctions are addressed promptly. Optimization may also be performed to fine-tune the network’s performance and ensure that the rooftop site is providing maximum coverage and capacity. This can involve adjusting antenna angles, calibrating equipment, or fine-tuning network settings. 3.5 Maintenance and Monitoring Once the rooftop site is operational, it’s important to keep it well-maintained. Regular inspections and preventative maintenance ensure that the equipment remains in good working condition. This can involve checking for wear and tear, cleaning the antennas, and replacing any damaged components. Continuous monitoring of the network helps identify any performance issues or potential problems, ensuring that the rooftop site continues to provide reliable wireless connectivity. 4. Challenges of Rooftop Site Builds While rooftop site builds offer numerous benefits, there are a few challenges to consider: Structural Limitations: Not all rooftops are suitable for equipment installation. Structural integrity, roof access, and weight-bearing capacity are critical factors in determining whether a rooftop can support communication equipment. Permitting and Regulations: In many regions, rooftop installations require permits and adherence to strict zoning laws and regulations. This can sometimes slow down the installation process and increase costs. Weather Conditions: Rooftop installations must be able to withstand harsh weather conditions. High winds, storms, and temperature extremes can affect the equipment, requiring additional planning for weatherproofing and durability. 5. Conclusion Rooftop site builds are essential for expanding wireless connectivity in urban environments, offering a practical and cost-effective solution for improving network coverage. By maximizing space, enhancing signal quality, and enabling quick deployment, rooftop sites provide a critical service for telecommunication companies and internet service providers. Whether it’s improving mobile connectivity or expanding broadband networks, rooftop site builds are helping bridge the gap in our connected world. With careful planning, design, and maintenance, rooftop site builds can provide reliable, long-lasting communication

How We Deal with Fiber Trenching
Fiber optic technology is revolutionizing the way we connect to the internet, enabling faster speeds and more reliable communication. However, the process of installing fiber optic cables often requires trenching, a critical step in laying down the infrastructure. In this blog, we’ll discuss how we handle fiber trenching to ensure it’s done efficiently, safely, and with minimal disruption. 1. Planning and Site Survey Before we start any fiber trenching project, we conduct thorough planning and site surveys. This is a crucial step to identify the best path for the fiber cables, assess the terrain, and recognize any potential obstacles such as existing utilities, tree roots, or rocks. We also check local regulations and permits to ensure compliance with legal and safety standards. 2. Choosing the Right Equipment Fiber trenching requires specialized equipment for digging, laying, and securing the cables. Depending on the job, we may use trenching machines, excavators, or vibratory plows to cut through the soil and create the trench. For smaller-scale projects or where equipment access is limited, we might opt for hand digging. Our team is equipped with modern, well-maintained machines that are capable of digging trenches quickly while minimizing the disruption to the surrounding area. This ensures the trenching is efficient, reducing both time and cost. 3. Safety Precautions Safety is a top priority during fiber trenching, both for our workers and the general public. We take extra care to ensure proper signage is placed around the work area to alert passersby of potential hazards. In addition, our team is trained in trench safety, and we follow proper excavation protocols to prevent accidents, cave-ins, or any unforeseen damage to underground utilities. We also ensure our workers wear the appropriate protective gear, including helmets, gloves, safety boots, and high-visibility clothing, to minimize the risk of injury. 4. Excavating the Trench Once all preparations are in place, we begin the excavation process. The trench typically needs to be about 18 to 36 inches deep to ensure that the fiber cables are securely buried and protected from damage. The depth may vary based on the local environment, weather conditions, and specific project requirements. We take great care to minimize any environmental impact, preserving nearby plants and ecosystems. Whenever possible, we avoid disrupting public or private properties to ensure a smooth installation process. 5. Laying the Fiber Optic Cables With the trench dug, the next step is to lay the fiber optic cables. We use industry-standard techniques to protect the cables from damage during installation. Depending on the environment, the cables may be encased in protective conduits to guard against moisture, rodents, and physical damage. For added protection, we may place a warning tape above the cables within the trench, signaling the presence of the fiber optics to any future excavation work. This serves as a precaution to prevent accidental damage. 6. Backfilling and Restoration After the fiber optic cables are securely laid down, we backfill the trench, ensuring that the soil is compacted and level. We take care to restore the site to its original state, whether it involves replanting grass, reseeding, or replacing any paved surfaces that may have been disturbed. Restoration is a vital part of the process to ensure that the area looks as if the trenching work never took place, leaving behind minimal disruption to the environment or the local community. 7. Testing and Final Checks After the trenching and installation are complete, we conduct thorough testing of the fiber optic cables to ensure they are fully functional and meet the required standards. We check for any signal loss, verify connectivity, and ensure the system is working as expected. If any issues are found, we take immediate action to resolve them, ensuring that the fiber optic network delivers the promised performance. 8. Ongoing Maintenance and Monitoring Once the fiber trenching project is completed, our work doesn’t end there. We offer ongoing maintenance services to ensure the fiber optic network remains operational and efficient. This includes regular inspections, cable monitoring, and addressing any potential issues that may arise over time. Conclusion Fiber trenching is an essential part of building reliable and high-speed communication networks. By carefully planning the project, using the right equipment, prioritizing safety, and ensuring minimal disruption, we can provide seamless fiber optic installations that benefit both businesses and individuals. Our team is dedicated to delivering efficient, high-quality results that support the growing demand for faster internet and connectivity.
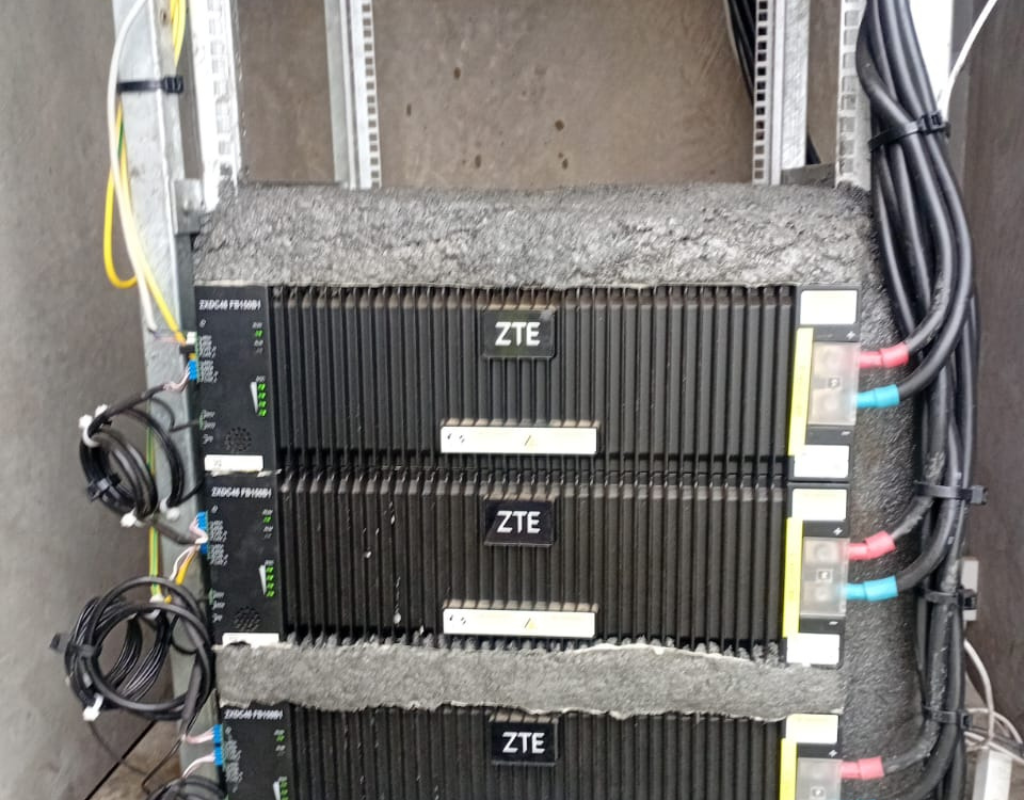
efficient battery installation
Efficient Battery Installation: A Guide for Optimal Performance and Longevity When it comes to powering devices, machinery, or even homes, batteries play a critical role. Whether you’re installing a car battery, an inverter battery, or powering your home with solar energy, ensuring a proper installation can drastically improve battery performance and lifespan. In this blog, we’ll explore the essential tips for efficient battery installation. 1. Choose the Right Battery Before diving into installation, it’s essential to select the right type of battery for your needs. Consider factors such as battery size, voltage, and capacity, which vary depending on the application. For example, a deep-cycle battery works well for off-grid solar systems, while a lead-acid battery is common for automotive use. 2. Ensure a Clean and Dry Environment Batteries should always be installed in a clean, dry, and well-ventilated space. Moisture can cause corrosion and damage the terminals, while dirt or dust can interfere with the connections, leading to poor performance. When installing a battery, ensure the area is free from contaminants, and there is good airflow to avoid overheating. 3. Wear Protective Gear Safety is crucial when installing batteries. Always wear safety goggles and gloves to protect yourself from acid spills or electrical contact. If you’re working with a car battery, make sure to disconnect the negative terminal first, and always connect it last. 4. Position the Battery Correctly When positioning your battery, it is important to place it in a stable position that prevents movement. A securely positioned battery will reduce the risk of internal damage and prevent short-circuiting. Ensure the battery terminals are positioned in a way that allows easy access for future maintenance. 5. Properly Connect the Terminals When connecting the terminals, always follow the correct polarity: connect the positive terminal first, followed by the negative terminal. Tighten the connections with a wrench, ensuring they are firm but not overtightened, as this can damage the terminals. For lead-acid batteries, make sure the battery terminals are clean and free of corrosion. A small amount of petroleum jelly or terminal protector can help prevent future corrosion. 6. Check for Ventilation Some batteries, such as lead-acid, emit gases during charging. It’s essential to install your battery in an area with proper ventilation to prevent the buildup of harmful gases. If you’re using a sealed battery, this step might be less critical, but it’s still advisable to check the manufacturer’s recommendations. 7. Test the Battery Installation Once the battery is installed, it’s time to test the connections. Check for any unusual noises, smells, or signs of heating that could indicate a problem. Using a multimeter, measure the voltage across the terminals to ensure it aligns with the specified battery voltage. 8. Maintain the Battery After installation, routine maintenance is essential for optimal battery performance. For instance, monitor the charge levels and clean the terminals periodically to avoid corrosion. If you’re using a solar-powered system, regularly check the battery’s state of charge and ensure it’s in good condition to maintain efficiency. Conclusion Efficient battery installation not only ensures optimal functionality but also extends the battery’s lifespan, reducing unnecessary replacements. By choosing the right battery, connecting it properly, and maintaining it, you can significantly improve performance and avoid common installation pitfalls. Whether for your vehicle, home, or solar energy system, a little care during the installation goes a long way in ensuring your battery serves you well for years to come.